Friday, October 26, 2012

Cooking For One Plus Three

Sometimes you have to cook for one. Whether your spouse is travelling or you’re a single parent, maybe your spouse is a picky eater like your kids. Whatever the reason, the food that I crave is rarely the same as what my kids want. They are decent eaters but so careful about what goes into their mouths. For this reason, I often use a method of feeding our family which I like to call deconstruction. I first figure out what I want to eat and then I take some or all of the elements and feed them to my children in the purest form possible, individually and untouched by seasoning and heavy flavoring. I always make them take a “try it” bite which they now know is nonnegotiable, after many years of convincing-yes it has taken years to get this one right but it was worth the work and trial and error-they never escape the table without at least a nibble.  

 
Now onto my dish of the day: Steamed Mussels with Whole Wheat Pasta. I consider it to be one of the greatest, healthy-comfort foods. It actually gets people excited and begging for more bread so they can sop up the juice at the bottom of the bowl. If you have to choose between carbs, leave out the pasta and reach for the crusty bread. It’s a delicious marriage between texture and flavor. Another thing that I love about this dish is that mussels are on the sustainable, okay-to-eat list. For more information on that check out: http://www.fishonline.org/  They are also relatively inexpensive for those of you who care about cost. I think I paid $2 for the ones I used in this recipe-not bad. A sneaky little secret that I learned when I worked in New York City restaurants was just how much they marked them up. They have a pretty big margin. I often don’t get them in restaurants because I know that I can make them just as well, if not better and mine don’t cost much.
 
The only downsize to steamed mussels, and I mean ONLY, is there is no way that I could convince my kids to make a meal out of them. What do I do instead? I make extra pasta, chop up some carrots, peppers, cucumbers, or whatever I have on hand, and then I have my adult meal with them. I do put a mussel on each plate for the “try it” bite and recommend they chase it with milk if they need to. Overall, I would say the meal is a win-win because they also really dig the bread that I put on the table.

Make sure you scrub your mussels well, de-beard them and season the cooking liquid if needed. Fennel fronds are the leafy part at the end of a fennel plant. I had it so I threw them in but if you do not have it, just leave it out. Feel free to put in any herb you might like. Enjoy!


Steamed Mussels With Whole Wheat Pasta
Serves 1

Ingredients:
1 small shallot
1 clove garlic
¼ pound whole wheat spaghetti
2 tablespoons extra virgin olive oil
Pinch of red pepper flakes
½ bay leaf
¼ cup white wine such as Pinot Grigio
¼ cup clam juice
Zest of ½ lemon
½ dozen mussels, scrubbed and beards remove
1 plum tomato, diced
1 teaspoon chopped parsley
1 tablespoon fennel fronds
½ tablespoon butter
Salt and Pepper to taste

Equipment:
Cutting board
Chef’s knife
Microplane Grater/Zester
Strainer
Large pot

Procedure:
-Chop shallot. (Technique: Trim off non-root end. Make 1-3 cuts toward the root, holding the knife parallel to the cutting board. Make a few cuts toward the root again, this time cutting toward the cutting board with the tip of the blade pointing toward the root. Root should remain intact the whole time. Turn knife 180 degrees and cut toward the root until you can’t cut anymore.)

-Chop garlic. (Technique: Trim off root end of garlic with a large chef’s knife. Place the flat part of the knife on the garlic and smash the knife with the heel of your hand. The skin will slide right off so you can chop.)
-De-beard the mussels. (Technique: Pulling in a side-to-side motion, remove the fibrous material that hangs from one side of the mussels. It will not be visible in some.)
-Cook pasta in plenty of salted, boiling water.
-Meanwhile, heat the medium pot over medium heat. Add oil and cook red pepper flakes, shallots and garlic for about two minutes, stirring frequently.
 
-Add wine, clam juice, bay leaf and lemon zest and increase heat to medium-high. Once it boils, add mussels and tomatoes, cover and cook until mussels steam open, 3-5 minutes.
 
-Toss in parsley, fennel fronds and butter. Check seasoning (by this I mean get out a spoon and taste a little) and season with salt and pepper if needed.
-Pour over pasta and serve with crusty bread.


Tuesday, October 23, 2012

Bloopers

I have a friend who recommended that I have a section on my blog called, "Bloopers". Sounded like a great idea to me! I mean, wouldn't it be fun to hear the stories of disasters or mishaps in the kitchen that a trained chef makes? For some reason, it doesn't matter how much I know about cooking, if I have the distractions that come with raising my 3 children, and trying to run a household, I at times can't accomplish anything. I mean, it has taken me 10 minutes to write these past few sentences because I got a visit from some young, preppy political flunky who wanted to know if I'm voting for Obama or Romney, Allen or Kaine. It's bad enough that they call you, right? (Actually, I'm unlisted so my mother-in-law is unfortunate enough to get our calls for some reason.) My daughter is also yelling to me from another room asking for spelling help with a birthday card she is working on. Distractions, distractions everywhere!

My first story is something that happened just the other day. I was sweating peppers and onions that went with a dish for an event I had to attend. (When you “sweat” vegetables, you cook them in a pan with oil or butter over medium heat, stirring often, so they don’t brown. The idea is to soften them.) My pan was really hot so I just threw in the oil then the onions which were already sliced. The peppers were not ready to go but I was already late for the occasion and had to get things going so I figured I could quickly cut them up and throw them in as I went which can be a mistake in cooking. (You should always have everything prepped and ready to go before you cook. It’s called mise en place which is French for everything in place.) I had half a pepper in the pan when my daughter yelled to me that her little brother just pooped on the floor. He’s screaming, I’m yelling don’t move, he’s screaming some more which is when I dropped what I was doing and ran to help him before he stamped the house with poop footprints. Onions and half of a pepper are cooking, I’m cleaning him and his mess up and the peppers aren’t in the pan yet. After a few minutes I did manage to give the onions and half pepper a stir by holding the wooden spoon between my wrists. Five minutes later when I made it back to my pan, I quickly finished putting the peppers in, cooked them for a few more minutes and then turned off the heat, covered the pan and essentially let them steam until I had to leave. They were not evenly cooked but they turned out just fine, different from my expected outcome, but fine.
 
I have sweated many vegetables many times so I knew how long I could be away from the pan before things got ugly. If someone had asked me what the right course of action would have been I would have recommended taking the pan off the heat until you were able to give it your full attention. I rarely follow my own advice though! My Real Mom suggestion: don't expect perfection when you're cooking. Life will distract you whether it be kids or a good conversation. Not every mistake is fixable but every mistake is a learning experience for the next time so don't be afraid of failing in the kitchen...Get out there and cook!

Monday, October 22, 2012

A Healthy, After-School Snack


Sometimes simple recipes aren’t so simple if you do not know how to quickly and efficiently prepare the ingredients. Chopping an onion can take 30 seconds or 5 minutes depending on how you do it. A big focus of this blog is to teach you techniques, not just how to follow a recipe. I researched a lot of blogs when I first had the idea to create my own. One thing I found was that although many of the recipes are terrific, they can be very intimidating if you do not know the basics of food preparation. Since I am lucky to have those skills, I am comfortable preparing most things. There are also lots of useless gadgets out there that honestly don’t even work very well, like apple corers. All you really need is a big knife and a cutting board and you can accurately and uniformly slice or cube your apples with minimal waste.

The next recipe is my oldest daughter’s favorite after-school snack. It takes no time at all to prepare, once you know how to cut up an apple, and it is loaded with nutrients. Apples have a ton of fiber, among other valuable vitamins, while peanut butter has protein and Greek yogurt has calcium, protein and less sugar than regular yogurt. You can also leave out the honey to cut back on sugar, but I wouldn’t recommend it because it tastes so good. I always use local honey because I have heard it can help build up your tolerance for seasonal allergies (I need that right now!). If you must slice your apples in advance, you can always toss them in a little lemony water-not too lemony, just enough to prevent browning (juice ½ of a lemon and add to 1 cup of cold water). This process is called acidulation because the acid prevents browning. You can also use an orange or pineapple juice. Bon appétit!

Apple Slices & Peanut Butter Dip
Makes 1/2 Cup
 *Gluten Free*
**For a nut-free version, use sunflower seed butter. You may need to adjust honey amount depending on whether or not there is a sweetener in it.**

Ingredients:
1/4 cup all natural, no sugar-added peanut butter
1/4 cup 2% Greek yogurt
2 teaspoons local honey
1 large or 2 small apples
Equipment:
Cutting board
Chef's knife
Silcone spatula
 
Procedure:
-Combine peanut butter, yogurt and honey in a small bowl and set aside.

-Core and slice apples. (Technique: Cut apple(s) in half from stem to base. With the flat sides down for stability, cut in half again, going right through the core. You will now have 4 pieces. Make a diagonal cut through each quarter, removing the core. Slice each quarter in half and then cut each half again so you have 16 pieces total.)
-Place apples and dip on as decorative a platter as you see fit and enjoy!

Sunday, October 21, 2012

Soft Pretzels, Cheddar-Beer Dip and Potato-Leek Soup


My next set of recipes is perfect for this time of year. A little something for the parents, a little something for the kids and a lot of something that has to do with fall.

I had the pleasure of seeing my alma mater take down a big rival in football yesterday (Go Spiders!). We hosted a tailgate, with two other couples, that was attended by 50, maybe 60, people, ages ranging from newborn to 50 something. It was sunny and 70 degrees and all in all, a perfect day. The husbands wanted to be in charge of this one which was fine by me. The theme they settled on: Oktoberfest. German beer, brats, and German chocolate. Well, not exactly German chocolate-more like American chocolate, and all different kinds. Pretty much a giant Halloween sampler. They don’t get to do the shopping often so they are literally like kids in a candy store when presented with temptation. Everyone loved what they bought so they did well. As for my contribution to the workload, naturally I offered to make whatever they wanted. It had to be easy to serve and of course, within the theme.

The first I came up with, which is one of my favorite fall snacks, was homemade pretzels. I typically come up with my own recipes but like everyone else who cooks, when I find a good one I don’t make changes, or at least not many! The one I have used, time and time again, is by Alton Brown. His recipe makes 8 big knotted pretzels which wouldn’t work very well for a crowd because I would have to make ten times the recipe. My smart husband said, “Why don’t you make pretzel bites?” So simple. I doubled the recipe, and 200 bites later, I was all set. Kids and adults both gobbled them up.

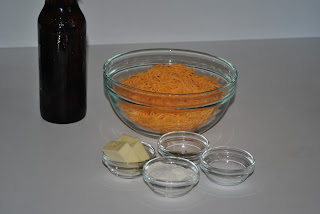
I usually make a dipping sauce to go with the pretzels that is quick and easy and always good-I mix equal parts mayonnaise and whole grain mustard and then stir in a little honey. If I want a kick, I add a little Dijon. It’s also a great spread for sandwiches if there are leftovers. Although that one is safe and easy, I felt like for a themed tailgate, I needed to step it up a notch so I created something that any man would love: a beer béchamel with sharp cheddar. It’s like a Frenchman meets a German lady in a bar in Wisconsin. What exactly is a beer béchamel with sharp cheddar? Translation: Cheddar Beer Dip. It was fantastic with the pretzels.

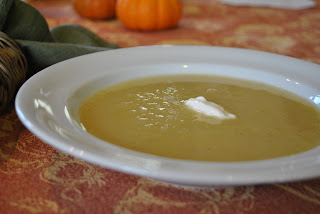
Another fall favorite of mine is Potato Soup. It’s actually Potato-LEEK Soup which is not exactly German but I was sure nobody would notice. It is derived from a very classic recipe that I learned in school. The nice thing about it is you can apply the technique to many different kinds of soup. I thought I would share the recipe since it was such a big hit at the tailgate.

Bon appétit!


***The following recipe for Homemade Soft Pretzels was borrowed from the Food Network website. This is what I changed to make the pretzels crowd friendly:
 -Preheat oven to 500 degrees.
-Roll each of the 8 dough pieces into 15" ropes and cut into 1" pieces. Boil in the same way and bake for 8-10 minutes, or until dark golden brown.

Homemade Soft PretzelsRecipe courtesy Alton Brown, 2007

  • 1 1/2 cups warm (110 to 115 degrees F) water
  • 1 tablespoon sugar
  • 2 teaspoons kosher salt
  • 1 package active dry yeast
  • 22 ounces all-purpose flour, approximately 4 1/2 cups
  • 2 ounces unsalted butter, melted
  • Vegetable oil, for pan
  • 10 cups water
  • 2/3 cup baking soda
  • 1 large egg yolk beaten with 1 tablespoon water
  • Pretzel salt

Directions

Combine the water, sugar and kosher salt in the bowl of a stand mixer and sprinkle the yeast on top. Allow to sit for 5 minutes or until the mixture begins to foam. Add the flour and butter and, using the dough hook attachment, mix on low speed until well combined. Change to medium speed and knead until the dough is smooth and pulls away from the side of the bowl, approximately 4 to 5 minutes. Remove the dough from the bowl, clean the bowl and then oil it well with vegetable oil. Return the dough to the bowl, cover with plastic wrap and sit in a warm place for approximately 50 to 55 minutes or until the dough has doubled in size.
Preheat the oven to 450 degrees F. Line 2 half-sheet pans with parchment paper and lightly brush with the vegetable oil. Set aside.
Bring the 10 cups of water and the baking soda to a rolling boil in an 8-quart saucepan or roasting pan.
In the meantime, turn the dough out onto a slightly oiled work surface and divide into 8 equal pieces. Roll out each piece of dough into a 24-inch rope. Make a U-shape with the rope, holding the ends of the rope, cross them over each other and press onto the bottom of the U in order to form the shape of a pretzel. Place onto the parchment-lined half sheet pan.
Place the pretzels into the boiling water, 1 by 1, for 30 seconds. Remove them from the water using a large flat spatula. Return to the half sheet pan, brush the top of each pretzel with the beaten egg yolk and water mixture and sprinkle with the pretzel salt. Bake until dark golden brown in color, approximately 12 to 14 minutes. Transfer to a cooling rack for at least 5 minutes before serving.
Makes Around 3 Cups
 
Ingredients:
2 tablespoons unsalted butter
2 tablespoons all-purpose flour
12-ounce bottle heavy beer
1 tablespoon Dijon mustard
3 cups shredded sharp cheddar
 
Equipment:
Small saucepan
Small whisk
 
Procedure:
-Make a roux (pronounced: rue): Place the butter in the saucepan and then turn up the heat to medium. Once melted, whisk in flour. Cook for 1 minute (will be pale in color).
 
-Add beer, whisking to combine. Whisk occasionally, until the mixture begins to simmer and thicken, around 10 minutes. Remove from heat and add the cheese and mustard. Season to taste with salt and pepper and serve warm.
*Gluten Free*
 
Ingredients:
 

Friday, October 19, 2012

Roasted Chicken with Chopped Kale Salad and Pumpkin-Quinoa Cake


I put a lot of thought into what would be the perfect first recipe to share and I came up with several ideas. After not being able to settle on one, I finally went to my panel of judges-kids and husband-and asked them what to do. They unanimously gave me the same answer: Roasted Chicken. Ironically, my old boss, Chef Flay, was on the Today Show yesterday morning making none other than Roasted Chicken, which to me meant that fate had showered me with confirmation that I had made the right decision. I think he shoved garlic and herbs into the cavity, seared it breast side down and popped it in the oven until the thigh registered 155 degrees. There are probably a million ways to do this but again and again, I go back to the same method that I have perfected and thankfully nail every time, resulting in moist, delicious chicken for a family of five, with leftovers (sometimes). My way is similar to Chef Bobby’s but I find that as a mom, even searing takes too much time and more surface to wipe down and clean from the splatters. Plus, we never eat the skin anyway-kind of defeats the purpose of eating a healthier meat, right?

I chose a couple of sides to go with the chicken that include ingredients that everyone knows you’re supposed to eat but tend to be used in very boring ways. I livened up kale by making it the main ingredient for a chopped salad and I combined quinoa with pumpkin purée, eggs and cheese to make a savory cake that is sure to surprise you.

So take a stab at these recipes and let me know what you think. Try them all at once or one at a time and discover how simple and delicious can go hand in hand!


Easy Roasted Chicken
Serves 4-6
Ingredients:
2 tablespoons extra virgin olive oil
1 lemon
1 medium onion, ends trimmed
1 4-5 pound whole chicken
6 sprigs fresh oregano
Salt and pepper to taste
 
Equipment:
1 medium skillet, large enough to fit the chicken
1 cutting board
1 pairing or chef’s knife
Paper towels
Meat thermometer
 
Procedure:
-Preheat oven to 375 degrees and set rack in middle of oven.
-Pour olive oil into skillet. Score lemon 4-5 times from end to end so juice will release. Slice onion into three thick rounds. Set aside.
 
-Remove chicken from packaging and discard insides. Rinse under cold water and pat dry with paper towels. Place in skillet and roll around to coat with oil. Separate skin from breast, being careful not to tear the skin. Place ½ of oregano sprigs between each breast and the skin. Season entire chicken, inside and out, with pepper and inner cavity with salt (The salt will prevent the skin from crisping properly.). Place lemon in the cavity and onion rounds underneath chicken so it is perched on top.
-Roast until the thickest part of the thigh registers 155-160, approximately 1 ½ hours. (My oven is always exactly 1 hour and 35 minutes for a 4 ½ pounder.) You will also notice that if you grab a leg and twist it, the meat will come away from the bone when it’s ready. That’s the old-school way to tell the chicken is done!
 
-Set aside for 15 minutes before carving.
 
-To carve, first cut between the breasts, on both sides of the cartilage that separates the two.

-Then make slices parallel to the cutting board from the top down.

-You can also cut a whole breast out as is seen to the left.

-Don't forget the two oysters on the back! My husband and I always eat one before we even sit down because they are the BEST part of the chicken. The top picture shows a purplish cavity just above the lemon. That's where I carved one out. Can you tell where the oyster gets its name? The second picture is just to give you an idea of how big it is (the lemon is for scale).
 
-----------------------------------------------------------
 
Now for the Chopped Kale Salad. I used hemp seed oil because it is really good for you. A LOT of Omega 3's. If you don't have it, use extra virgin olive oil instead. As for the leftover red pepper half, I usually cut it into strips, along with cut-up carrots, and give it to my kids as a side since the salad may be a little much for them. This is what I call "deconstructing a recipe" to make it more appealing to kids. If your kids don't like things mixed together, pull some or all of the critical ingredients out and serve them indiviually just so it is less intimidating. That way they will expand their palates and get some nutrients too. I swear deconstructing recipes has made my kids better eaters overall!
 
 
Chopped Kale Salad
Serves 6
 
Ingredients:
Dressing
1 clove garlic, minced or chopped
1 tablespoon chopped oregano
3 tablespoons balsamic vinegar
1 teaspoon Dijon mustard
1/8 teaspoon freshly ground black pepper
¼ teaspoon sea salt
¼ cup hemp oil or olive oil
 
Salad
1 bunch Kale
1 medium carrot, peeled
½ red pepper
1 bunch scallions
 
Equipment:
Cutting board
Chef's knife
Measuring cups/spoons


Small food processor (if you have one)

Medium bowl

Whisk


Procedure:
Dressing
-Small Food Processor Method: Place garlic and oregano in food processor and pulse to chop. Add vinegar, mustard, salt and pepper and pulse to combine. With the machine running, slowly pour in oil until blended.
-Hand Method: Mince garlic and chop oregano and place in medium bowl. Whisk in vinegar, mustard, salt and pepper. In a slow, steady stream, pour in oil, whisking constantly until blended. Set aside.
 
Salad
-Remove stems from Kale one by one. (Technique: With one hand, hold the thick base of the stem. With the other hand, run your fingers along the stem, separating the stem from the leaf.) Stack stems and slice into small strips. Add to large bowl.
-Starting with the tip of the carrot, use a peeler to make 2” strips. Peel directly over kale, turning the carrot and moving up the carrot as you go.
 
-Dice the red pepper. (Technique: Slice the pepper in half from stem to base. Remove stem by pulling it from the inside toward the outside.) Chop half of pepper into small dice and reserve other half for another use.
 
-Add peppers and scallions to kale and carrots. Toss with 2/3 of dressing, reserving remainder for another use, and serve.
 
-----------------------------------------------------------
 
I absolutely LOVE quinoa but I like to serve it in more interesting ways than you would with a bed of rice. The Pumpkin-Quinoa Cake is not a cake like a birthday cake but more a savory cake, just like crab cakes are savory. You could shape these and bake them as indivual cakes but I thought by doing one big one and slicing it, more time would be saved! Everything but the chopped parsley is more or less a pantry item so it is quick and easy to prep. Throw it in the oven with the chicken and walk away until it's done. It is gluten free and if you prefer to make it vegan, substitute vegetable stock for the chicken broth, omit the cheese and eggs and brush the top with olive oil. Bake as you would the original version but scoop instead of slicing since it will fall apart.
 
Pumpkin-Quinoa Cake
Serves 8-10
 
Ingredients:
Cooking spray
1 ½ cups quinoa
3 cups gluten free, low-sodium chicken broth or stock
3 eggs, lightly beaten
1 15-oz. can pure pumpkin puree
½ cup grated Parmigiano-Reggiano (or good quality parmesan) cheese, plus 2 tablespoons for sprinkling
3 tablespoons chopped Italian/flat leaf parsley
1 teaspoon cinnamon
1 teaspoon salt
3/4 teaspoon ground black pepper 
Equipment:
Small mesh hand strainer
1 medium saucepan with tight-fitting lid
Measuring cups/spoons
Large bowl
Wooden spoon
Pie plate or other decorative small casserole dish
Procedure:
-Preheat oven to 375 degrees. Spray a pie plate or a small casserole dish with cooking spray and set aside.
-Rinse quinoa under cold, running water. Place in saucepan with broth and bring to a boil. Lower heat to medium-low, cover and cook for 15-20 minutes, or until liquid is all absorbed. Cool slightly.
-Mix quinoa with remaining ingredients, sprinkle 2 tablespoons of cheese on top, and bake for 35-40 minutes. It will puff a little when done and will feel slightly firm to the touch. Cool 10 minutes to set and serve in wedges.
 

-----------------------------------------------------------

 
Time to go to the bus stop. Bon Appetit!